
Learning how to stick weld often begins with striking an arc for the first time and noticing how the metal responds to the heat. Understanding how heat, movement, and materials interact at the joint is central to gaining control. This method is widely used because it is adaptable, portable, and suited to many working environments. Success depends less on speed and more on preparation, consistency, and steady movement. Early results often vary, which is a normal part of skill development. This guide breaks the process into practical stages to support confident, repeatable results.
Foundations of Stick Welding and Arc Formation
What Stick Welding Involves
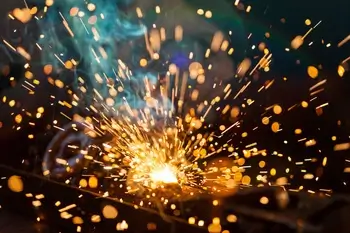
Stick welding is a manual method used to join metal by generating heat at the joint through an electrical discharge. It is commonly introduced early because it requires relatively simple equipment and adapts well to varied working conditions. Learning how to stick weld involves understanding both hand control and how heat behaves at the joint, rather than relying on automation.
For beginners, stick welding basics focus on coordination, consistency, and recognising how the joint responds as heat is applied. This method forms the starting point of many people’s welding journey, particularly in fabrication, maintenance, and repair environments. The process demands attention to hand position, distance, and timing, which gradually develop through practice rather than speed.
How the Arc Creates Heat and Fusion
At the centre of the welding process is an electrical discharge that produces intense heat. In arc welding, current flows across a small gap between the electrode and the workpiece, forming an electric arc. Stick welding is formally known as shielded metal arc welding, a process where the electrode coating creates protection as heat forms at the joint.
This arc concentrates energy at the joint, raising temperatures high enough to soften and combine materials. As heat builds, molten metal forms at the joint, allowing the added material and parent material to merge. The base metal beneath the arc also heats and partially melts, which is essential for creating a strong bond. Control at this stage determines how evenly heat is distributed and how consistently fusion occurs.
Too much heat can distort the joint, while too little prevents proper bonding, making balance a core skill to develop early.
What Beginners Should Expect When Starting
Early experiences often involve short practice runs rather than completed projects. Initial attempts may feel awkward as hand movement, distance, and timing are still unfamiliar. Many beginners notice variability in results, which is a normal part of learning welding as a hands-on skill.
Progress comes from recognising patterns, such as how small changes in movement affect the joint and how visual cues signal proper fusion. Patience is essential, as control improves gradually rather than immediately. Over time, repeated practice helps movements become steadier and decisions more intuitive. By focusing on fundamentals and understanding how heat, movement, and materials interact, beginners build a foundation that supports more advanced techniques later on.
Equipment, Power, and Electrode Selection
Choosing the right equipment and consumables plays a major role in how consistently heat is delivered, how stable the arc feels, and how predictable results become during welding.
Welding Machines and Power Setup
A stick welder provides the electrical energy needed to generate heat at the joint and must be matched to the work being carried out. The power source controls current output and directly influences arc behaviour, penetration, and overall control.
Reliable electrical delivery depends not only on the machine but also on how the electrode is managed during welding. An electrode holder allows the operator to grip and guide the electrode safely while maintaining electrical contact. Some setups use a twist lock holder, which secures the electrode more firmly and reduces unwanted movement during operation.
Storage also matters, as moisture can affect performance, which is why an electrode oven is often used to keep consumables dry and stable before use. Together, these components form the foundation of a controlled and repeatable welding setup.
Understanding Electrodes and Coatings
Stick electrodes are consumable rods that conduct current and provide filler material as welding progresses. Each electrode type is designed for specific conditions, materials, and performance characteristics. Electrode diameter also plays a role in current control and heat delivery, influencing how easily the arc can be managed during welding.
The outer electrode coating plays a critical role during welding by stabilising the arc and influencing how the weld forms. This flux coating melts as the electrode burns, creating shielding and helping control impurities at the joint. Some coatings include iron powder, which can increase deposition efficiency and improve productivity in certain applications.
A low hydrogen electrode is often selected where strength and crack resistance are priorities, as it limits moisture-related issues. For corrosion-resistant work, stainless steel electrodes are used to maintain compatibility with the parent material. Understanding how coatings affect behaviour helps ensure the electrode performs as expected during welding.
Matching Electrodes to Different Metals
Material selection influences how heat is absorbed and how the joint responds during welding. Mild steel is commonly welded with general-purpose electrodes that offer stable performance and forgiving characteristics. Carbon steel may require more careful selection to balance strength and control heat input effectively. When working with stainless steel, matching electrode composition helps maintain corrosion resistance and appearance.
Cast iron presents additional challenges due to its structure and sensitivity to heat, often requiring controlled techniques and careful consumable choice. Using specific electrodes designed for each material supports better fusion and reduces the risk of cracking or distortion. Matching the electrode to the metal ensures compatibility between filler and parent material, leading to more predictable outcomes and improved overall control during welding.
Preparing the Workpiece and Setting Up the Weld
Careful preparation before striking an arc reduces avoidable issues and helps ensure the joint responds predictably once heat is applied.
Preparing the Metal Surface
The condition of the metal surface has a direct influence on how evenly heat transfers and how well materials fuse. Dirt, rust, paint, and oils can interfere with fusion, leading to weak or inconsistent results. Cleaning should be thorough but practical, focusing on the immediate area to be welded rather than the entire workpiece.
A wire brush is commonly used to remove light corrosion and surface contaminants without altering the underlying material. For practice or testing, scrap metal is often prepared in the same way as a final workpiece to build familiarity with cleaning routines. Consistent preparation creates a reliable starting point, allowing technique rather than surface contamination to determine the outcome of the weld.
Joint Fit Up and Access
How parts are aligned before welding affects penetration, strength, and ease of control. A clean, well-aligned weld joint allows heat to reach the root of the connection without excessive buildup at the edges. Gaps that are too wide or too tight can both create challenges, either by requiring extra filler or restricting access.
In some cases, edges are prepared to form a square opening, which helps guide the weld metal into the joint more evenly. Access for the electrode should be considered at this stage, as limited clearance can restrict movement and visibility. Taking time to adjust fit-up before welding begins reduces the need for correction later and supports steadier control once the arc is established.
Positioning the Workpiece
The chosen welding position determines how gravity affects molten material and how the operator manages movement. For beginners, starting in flat and horizontal positions allows better visibility and control, making it easier to observe how the joint responds to heat. Within these setups, horizontal positions still require attention to prevent material from sagging or piling unevenly along the joint.
As skills progress, other orientations can be introduced, each presenting different challenges in terms of control and balance. Overhead welding places additional demands on coordination and awareness, as molten material behaves differently when gravity works against the weld. Thoughtful positioning before welding begins helps match the task to the current skill level and reduces unnecessary difficulty during execution.
Arc Control, Pool Management, and Welding Technique
Control over the arc, movement, and molten material is what turns a basic setup into consistent weld quality, making this stage central to developing confidence and accuracy.
Controlling Arc Length and Stability
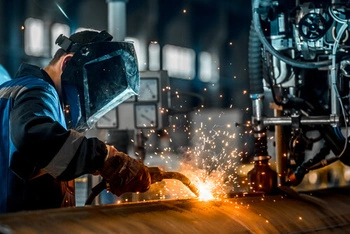
Maintaining the right arc length is one of the most important skills to develop early, as it directly affects heat control and consistency. A proper arc length keeps the arc focused and prevents excessive spatter or uneven heating at the joint.
When the distance becomes too long or too short, achieving a correct arc length becomes difficult, often leading to inconsistent results. A stable arc produces a smooth, predictable sound and allows heat to transfer evenly into the joint. In contrast, poor arc stability can cause fluctuations that disrupt the weld pool.
An erratic arc may jump or wander, making control challenging and increasing the risk of defects. Some operators notice the arc sounds louder when the distance increases, while a soft arc usually indicates closer, more controlled positioning. Learning to recognise these cues helps fine-tune control through sound and visual feedback.
Managing the Weld Pool and Bead Shape
Observing and responding to the molten material is key to shaping a consistent weld. The weld pool forms directly beneath the arc and reflects how heat and movement interact at the joint. As material melts, the weld puddle provides visual feedback on whether fusion is occurring evenly across the joint. Controlling this molten area influences the appearance and strength of the finished joint.
The shape of the weld bead depends on how steadily heat is applied and how the electrode is guided. Excessive buildup can result in a convex bead, while insufficient fill leaves the joint underdeveloped. Learning to manipulate the electrode with small, controlled movements allows the pool to remain balanced and helps maintain uniform bead width along the joint.
Travel Speed and Directional Techniques
Movement along the joint must be coordinated with heat input to achieve consistent fusion. Travel speed that is too fast may prevent adequate melting, while moving too slowly can overheat the joint. Controlled movement supports deep penetration without excessive buildup on the surface.
Adjusting motion also interacts with arc force, which helps drive molten material into the joint when balanced correctly. Different welding techniques influence how heat and filler are distributed during welding. Among common stick welding techniques, directional choices play a role in bead shape and visibility.
The backhand welding technique involves pulling the electrode, which can improve penetration and visibility for some applications. The push or forehand technique moves the electrode forward into the joint, often offering better control over bead appearance. Understanding when to apply each approach helps adapt the technique to joint conditions and position.
Common Problems During Welding
Even with careful setup, issues can arise as skills develop. Electrode sticking often occurs when the arc length becomes too short or when movement pauses unexpectedly. Excessive heat or prolonged contact can cause electrode charring, affecting arc quality and control.
In some cases, the electrode melts unevenly, leading to unstable arc behaviour and inconsistent bead formation. These challenges are common during the first stick weld, when coordination and timing are still developing. Recognising the cause of these problems helps adjust technique rather than forcing the process. With experience, responses become more automatic, and control improves as movements become smoother and more deliberate.
Results, Strength, Comparison, and Finishing the Weld
Once the arc is extinguished, attention shifts from technique to outcomes, including joint strength, surface condition, and how the finished work compares with other welding methods.
Building Strength and Penetration
The strength of a joint is determined by how effectively materials fuse beneath the surface. Properly deposited weld metal must integrate with the surrounding material to form a continuous structure rather than sitting on top of the joint.
In thicker sections, multiple passes are often required to build up the joint gradually, allowing heat to reach deeper areas without overwhelming the surface. This layered approach supports improved fusion and more uniform distribution of stress. Electrical settings also play a role, as a direct current electrode positive is commonly used to achieve steady heat input and reliable penetration.
When these elements are balanced correctly, the joint develops sufficient tensile strength to withstand applied loads without cracking or separation. Strength is not determined by appearance alone, but by how well heat and filler combine below the surface.
Comparing Stick Welding With Other Methods
Stick welding is often compared with other common processes to understand where it fits well. Unlike methods that rely on external shielding gas, stick welding generates protection through the electrode coating, removing the need for a gas tank on site. This makes it practical in locations where portability matters. In contrast, MIG welding offers faster deposition and is often preferred for thinner materials or controlled environments.
A TIG weld provides high precision and clean results, particularly on thin sections, but requires more coordination and stable conditions. TIG machines are typically chosen for detailed work rather than general fabrication.
Each process has advantages depending on application, environment, and material, and understanding these differences helps select a suitable approach rather than relying on one method for every task.
Cleaning, Inspecting, and Evaluating Results
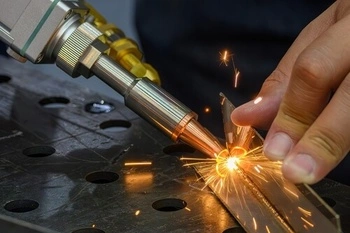
After welding, surface cleaning and inspection help reveal the true quality of the joint. A protective layer of slag forms during welding and must be removed before assessment. A chipping hammer is commonly used to break away this residue, followed by light brushing if needed. Once cleaned, the finished weld can be examined for uniformity, consistency, and signs of incomplete fusion.
Visual checks focus on bead shape, transitions into the base material, and surface continuity. Over time, comparing outcomes builds awareness of what adjustments lead to better stick welding results. While appearance is not the sole indicator of performance, consistent shape and smooth transitions often reflect good technique.
With practice, attention to finishing becomes routine, supporting the production of a high-quality weld that meets both functional and visual expectations.
Supporting the Next Step in Your Welding Work
Learning how to stick weld is a gradual process built on understanding fundamentals, practising consistently, and refining control over time. Each stage, from preparation through to finishing, contributes to stronger results and better confidence at the weld joint. With the right setup and a clear approach, improvements become more predictable over time.
Progress often comes from recognising small adjustments that improve consistency rather than seeking quick fixes. Over time, these incremental improvements form a practical learning journey that strengthens both skill and judgement at the weld. Whether you are developing new skills or revisiting core techniques, having reliable guidance makes the learning process smoother.
Clear information and practical context help bridge the gap between practice pieces and real fabrication tasks. For further information on welding processes or to discuss fabrication requirements, we welcome you to visit our site or contact our team directly. Please contact Star Sheet Metal on (03) 9000 0280 or 0433 217 574.
References
codinter.com/en/stick-welding-a-complete-guide/
https://waylanderwelding.com/blog/stick-welding-smaw-beginners-guide